Looking for a different code?

Troubleshooting Guide: Error Code F17001
Relevant Product: All Pack Mule NXG Series vehicles
EV's Produced After: May 2017
Other Indicators: Low Battery Voltage
Corrective Actions
1.
Check Battery's Charge: Vehicle's batteries could be crucially low. Charge batteries 6-8 hours depending on the state of discharge.
2.
Water Level in Batteries: Checking your batteries water level can help determine if they are being charged to full operating voltage. If the water level is low, the battery will need DISTILLED WATER filled to approx. 3/8" from the opening of the hole. Be careful not to overfill as this can result in the battery overflowing while being charged.
3.
Check For Shorted Battery: Use a multimeter to check EACH individual battery. Make sure each battery has the correct voltage for its size. Having even ONE weak battery can result in run times being reduced and causing Code F17001 to appear.
4.
Examine Battery Terminals: Battery terminals that are loose or corroded can trigger Code F17001. Check all connections to the battery's solenoid motor and controller for corrosion and tightness. If obvious signs of corrosion, you can use a warm water & baking soda mixture to clean the terminals using a wire brush.
5.
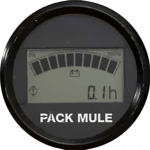
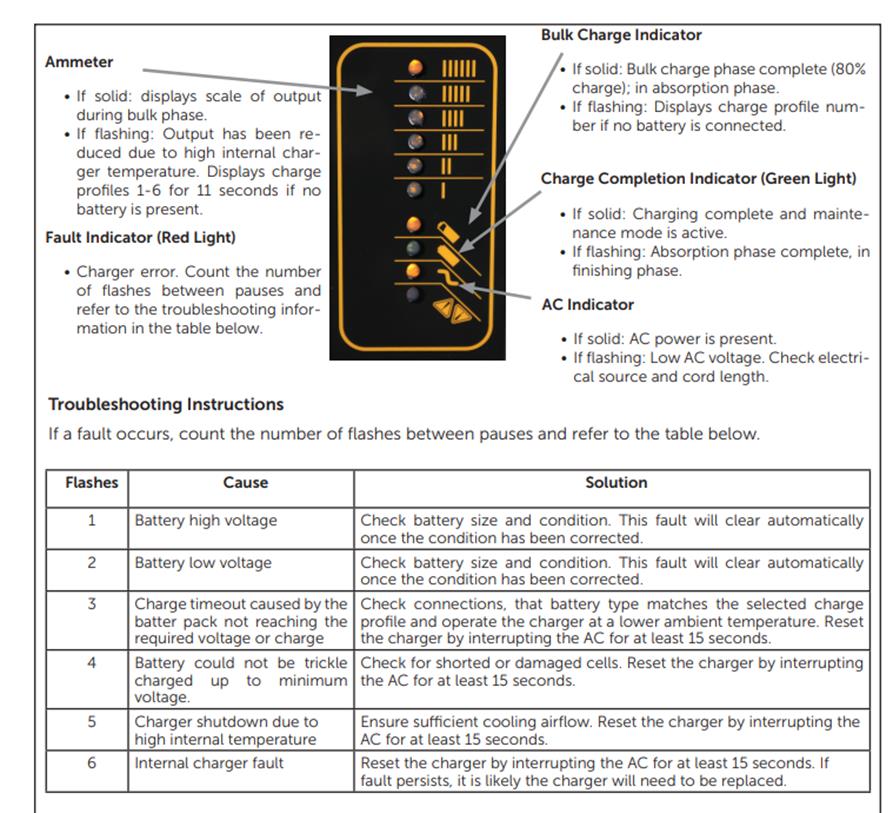
Confirm Vehicle is Charging/Check Screen Display for Fault Indicator: Once the vehicle has been plugged in to charge, examine the display to make sure the correct light is indicating that the vehicle is charging. If the vehicle is not charging, you will need to check the following possible issues (1) check the 120 Volt outlet for power (2) confirm power cord is plugged into the charger (3) check the condition of the power cord to make sure it is not damaged and in need of being replaced (4) if an extension cord is being used to charge your vehicle, it could be defective or too long for the charger to communicate properly (5) check display of the charger; if the display is blinking it means the input AC voltage is not sufficient (6) confirm there is power coming from the wall outlet. Attached below is a picture of the battery display and Troubleshooting Instructions based on the number of flashes located on the display. This can also be found on Page 13 of the owner's manual.

6.
Check Operator's Manual: Reference to this code can also be found on page 18 of the Owners Manual.
To prevent risk of electric shock, observe the following cautions:
Connect charger power cord to an outlet that has been properly installed and grounded in accordance with all local codes and ordinances. A grounded outlet is required to reduce risk of electric shock. Do not use ground adapters or modify the plug.
Do not touch uninsulated portion of output connector or uninsulated battery terminals. Disconnect the AC supply before making or breaking the connections to the battery.
Do not open or disassemble charger. Do not operate this charger if the AC supply cord is damaged or if the charger has received a sharp blow, been dropped, or otherwise damaged in any way. Refer all repair work to the manufacturer or qualified personnel.
This appliance is not intended for use by persons (including children) with reduced physical, sensory or mental capabilities, or lack of experience and knowledge unless they have been given supervision or instruction concerning use of the appliance by a person responsible for their safety.
Charger enclosure may be hot during charging. Use hand protection if handling the charger while charging.
CAUTION
No attempt should be made to open, repair, or otherwise modify the controller. Doing so may damage the controller and will void the warranty.
